Welding Glass ND Filter

In the last week I’ve been able to get really stuck into my photography on multiple occasions. This has been a nice change as over the last few months, I’ve only really been getting small amounts done – most of which has been towards my OCA TOAP course.

Last Sunday, I got all the images finished for my second assignment, which I’m now in the process of writing up, and on Wednesday, my wife took me away for a few days for my birthday. We went down to Weymouth, on the south coast, which was the ideal time for me to experiment with something I’ve been wanting to do for a while – using a piece of welding glass a an ND Filter.

The welding glass I purchased was a shade 10 piece of glass. To attach it to the end of my lens I blue tac’d it to a 77mm p-series cokin filter adapter which would then screw to my lenses.

With this done, I was set to go. The first thing that needed to be done was to set a custom White Balance, if this isn’t done, images come out looking something like this:

No WB-1

You could try shooting in RAW and then trying to adjust the white balance, but it doesn’t seem like Lightroom or Photoshop will let you push the adjustments far enough and also it would be difficult to see what your end result may be so I wouldn’t recommend this.

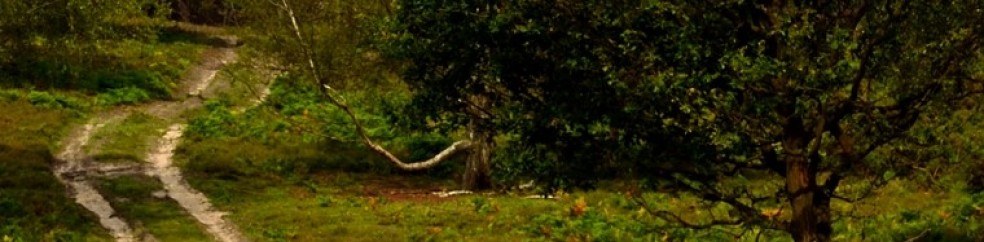
After setting the white balance, I needed to compose the scene without the welding glass attached and set the focus. Once the welding glass is attached, you can’t see anything through the view finder or using live view.

I was now ready to start to capture some images. Seeing as I don’t yet own a cable release, I decided to just experiment with a 30s exposure with ISO set to 100. This turned out significantly under exposed and seeing as I couldn’t boost the exposure any further (and was already using the widest aperture setting I thought I could get away with), I started boosting the ISO. A 400 ISO seemed to be getting the exposures about right.

Finally, with welding glass shots, you’re going to need to do some work in post production unless you’re happy with any colour casts that are present. I also found that the dynamic range seemed to have suffered (possibly due to bumping up the ISO) and I needed to do some work to bring out some shadow detail.

So, after adjustments, here are the results. Given the fact that the welding glass is 1/50th – 1/100th the price of some of the better known ND filters, I think these have been quite successful:

Weymouth with Welding Glass 4 - BW

Weymouth with Welding Glass 4

Weymouth with Welding Glass 3

Weymouth with Welding Glass 2

Weymouth with Welding Glass 1 BW

Weymouth with Welding Glass 1

2012 Is Flying By…

Wow, I can’t believe we’re nearly at the end of April and I haven’t posted anything this year.

Photography wise, I have had a quiet start to the year. Other than photography, I’m also interesting in running – although I’m not really built to be a runner. For a long time, it’s been my goal to run a marathon and on the 15th April I achieved my goal. The actual event hurt more than I was expecting, and I wasn’t expecting it to be easy. The thing about completing a marathon though isn’t the pain of running the event it’s the time commitment to do all the training.

Now that the marathon is done, I’ve got the free time I wanted to focus on something else I’ve been planning to do for quite a while – begin a photography degree. Doing some kind of formal training/qualification really appeals to me because it will provide me a structure for progression. The course I have chosen is the OCA – The Art of Photography. Other than providing the structure, the reasons that I’ve chosen this particular course are:

  • It’s distance learning so I can go at my own pace and study when it suits me.
  • The final deadline for each module is 2 years away so if something else comes along that forces me to stop studying for a while I won’t have lost everything (hopefully).
  • The way you record your progression is to maintain a learning blog. I thought this was a great idea as it’s effectively what I’m trying to do with this blog anyway.

So, I signed up last Monday and I’m now just awaiting for the course notes to arrive. This in itself has been a bit of a disaster. I’d asked for the notes to be delivered to my Wife’s work address but they tried to deliver them at my home address yesterday. Luckily, I was planning to work from home today anyway so I’m now eagerly awaiting there arrival (If they don’t come today it’s going to be a bit of a nightmare trying to get them). After signing up, I quite quickly got an email from my assigned tutor, Caroline. The email included a link to Caroline’s own personal website and her contact details. This was a nice reassuring first piece of communication and I have no doubt that I’m going to be learning a tremendous amount on this course.

I’ve still been going to the GPS meetings most weeks and finding it very interesting. Competition wise I got a good score with this image:

Misty Wey 4

There have also been some very interesting and inspiring talks from Tony Worobiec and John Beardsworth. Tony was showing and talking about landscape images taken well after sunset demonstrating the amount of detail that can be picked up in the soft lighting conditions and John was talking about B & W photography and the workflow and processing that can be done to achieve great results. I’ll be looking into books from both these photographers and authors at some point in the future.

The final thing to note is that in the last few weeks I’ve been becoming a bit of a lightroom convert. I’m quite amazed at just how easy and flexible the application is to use and although I can’t see it replacing GIMP completely at this point, I can see it becoming my main processing tool.

So that’s the update for my 2012 so far. I look forward to posting much more regularly once my course notes turn up.